Showing posts with label Rugged Edge. Show all posts

Monday, August 31, 2015

Journal Layout with Izink inks

12
Hi everyone, it's Vicky here today and I am sharing another page of my mixed media journal.


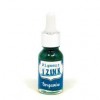
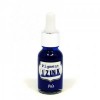
I have been sharing here many of my pages from this mixed media journal and I am using different mediums and techniques in each page while keeping the same flower theme through out the book. For my layout today, I am using IZINK inks as the coloring medium.


IZINK inks are really fun to use since you can dilute them with water and you can get a watercolored look while at the same time it is permanent!


You can mix the inks and get a smooth blend, like I did on the background, or use them without blending for a watercolor look, just like I did on the flowers and leaves.


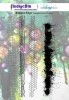
To finish off the layout I just had to do some embossing with "Bonjour Butter" embossing powder and also use my favorite border stamp from the "Rugged edges" set to frame my layout.

You can enjoy the video below


Supplies:


Thank you all for visiting!
Read More »

Friday, July 24, 2015

Cherish, Mixed Media Layout

1


Hey ladies and gents, Sherry here bringing you a bit of inspiration to start your day! As per normal I am going to give you a tiny bit of background into what inspired me for this layout! Inspiration can fuel any creative fire, what inspires you?

Ever since I was a kid, I have looked up to my big brother. He has been a solid male figure in my life and is extremely important to me. But, it wasn't till we were both adults that I really cherished this relationship! So this ones for him!

I am bringing you a layered, textured and stenciled layout featuring the beautiful Limor Webber Designs stamps and sprays! I love here signature sprays with Lindy's Stamp Gang because a) Limor has designed color palettes that span many different effects and looks from grungy to soft and pretty b) has both flat and shiny finishes and c)THEY'RE sprays, who doesn't love sprays!

And the stamps, I could talk to you all day about the amazingness of these stamps sets! She partnered with IndigoBlu to bring you a set of Limor Webber Designs Signature stamps that are  high quality deep ridged red rubber with loads of tiny details.  These stamp sets are amazing for laying and texture or as focal point for your designs! Today I will be utilizing the 'rugged edge' stamp set to create visual texture and interest in my background!

Well enough chit chat, lets get creating! Pull out your fav sprays, background stamps and play along! Also feel free to pop into the Limor Webber Designs' store to get any goodies you may have on your wish list :).   Full supply list and links can be found at the end of this post.


Step ONE

I started with a 7DotsStudio patter paper. I LOVE this paper because its a little bit of a heavier weight, and that's perfect for adding wet mediums with lots of layers!  Using a stabilo pencil, I marked where my photo would be placed at the end of the process! If you dont have a stabilo pencil you NEED one! It can write on anything and everything! it also makes a beautiful effect when you write or scribble with it and sprintz it with water! Try it!

I applied Prima resist chalk ink in 'teal demask' through the Prima 'grungy grid' stencil so it would peek out all along where the photo will be! The reason I chose the resist chalk, was because I knew I could layer sprays and other wet mediums overtop without re-activating the ink.

Step TWO
 
WOOHOO stamp time! Over the area where the chalk ink is, I made impressions of the 'rugged edge' stamps with black permanent ink. Then I took the splattered edge stamp and made impressions along the edges of the stabilo outlined area.


Next I took the 'ink splats' set and made embossed impressions along the edges of the stabilo out line as well, making sure these impressions would peek out from behind the photo when it goes on.


Step THREE

Using my fav fluffy paste,  whipped spackle by Faber-Castell Design Memory Craft®, I applied it through the EXTREMELY versatile heart texture stencil off the  left side of center. Keeping in mind where the photo would cover, you want to make sure you see the majority of the heart stencil.   Allow to dry.  Don't heat with a heat gun, as it will cause the spackle to blister and bubble.

Step FOUR

I found that once the stenciled heart was down that it was a bit to stark white on the page, so I went in with my sprays and made little puddles along the edge of where the photo would be. (This moisture also activated the stabilo pencil line, and caused it to run. Before the puddles dry I tilted my page to make drips that dripped up toward the top of the layout and allowed to dry naturally! Sometimes I find the heat gun causes the inks to spread more and flow in the wrong direction!

Step FIVE

For added texture and layers I then added a THIN layer of  whipped spackle through the 'weaving' stencil (my absolute FAVORITE stencil for layering and backgrounds).  I found that this layer picked up a little bit of the colors from the sprays from the last step because it was a thin layer.

Step SIX

Now for the final steps to finish it all off! Adhere photo into the area that was sketched out at the beginning of the process. To anchor the photo to the background, I applied one more layer of whipped spackle through a 'triangle pattern' stencil overlapping the photo a bit as well as some of the background.


Once my sentiment is adhered to the page, I dry brushed it with white gesso and allowed to dry. Using a piece of scrap paper, I covered most of the photo. I unscrewed the top and using the 'straw' from in the spray bottle I splattered the focal point area of the layout and the sentiment. Then repeated this with a variety of colors, allowing each to dry between layers to avoid mixing.

And now the big reveal! ;) lol


Thank you so much for popping in and checking out this layout. Feel free to check out my Facebook, blog and Instagram for more sneak peeks, tutorials and product tips and tricks! But, before you go be sure to peruse around and become inspired by all the other AMAZING projects and tutorials by the rest of the fab DT and the talented Limor Webber herself!


Oh ya, before I forget, your husband called... you got it, he said you can shop!

XOXO

SUPPLY LIST:

Read More »

Wednesday, July 8, 2015

I'm a Dreamer by Sherry Bienert

2
Hey all my crafty friends! Sherry here to share with you a little inspiration to start your day off right!


Sometimes I just sit and create in my head while I'm at work. I dream of all the things I will create when I get home to my space! I'm a daydreamer, and thinker of the pretty things that I want to leave in the world.


We are always so critical of ourselves and photos of ourselves, but we are just as important to remember and to document. We create around photos of our loved ones and other important things in our lives, but forget about ourselves. The photo I based this layout around is what I feel like when I am daydreaming, how I feel when I imagine beautiful things:)


Today I am sharing a different way to use your sprays! They are extremely versatile, and are more then just a spray bottle filled with color to be spritzed onto a page. Don't get me wrong, I adore a good spray any day of the week, but there is more to them then just a little spritz! So pull out your delicious colored sprays and play along!

This technique is best if applied to a neutral colored patterned paper.  I chose Prima's Cartographer Collection - 'Les Yeux'


I started by using Limor Webber Designs 'Rugged Edge' stamps along the left and right edge of the paper.  Then applied some Whipped Spackle through the Prima Donna Downey 'Turkish Grunge' stencil to create texture  and create a path for the colors of spray.  To add a bit of white space and to tie the first two layers together I applied Super Heavy Gesso through the Prima Finnabair Bubbles Stencil. I prefer Super Heavy Gesso for this as it will be completely white and thick so it holds it shape better than fluid or surface prep gesso.


**not pictured** I applied this same stenciling to the top and right edge of the photo to be featured on this layout.


Next is the FUN part! I selected 4 colored sprays to enhance the texture that we made on the paper, Lindy's Stamp Gang   Time Travel Teal, Orange Creamsicle, Pop Rock Purple and Raspberry Lemonade. Carefully unscrew all of the caps, and place them where you won't knock them over. I spritzed the side of the page I was working on with water. Work in one section at a time, so that you don't over saturate the paper.  Using the 'straw' of the nozzle for your lightest color first, drag the color into the spots between the stenciled and texture areas. I rotated between the four colors allowing each to partially dry between colors. If the applied color doesn't run enough, simply spritz with water to get the pigment moving. I made sure to tilt the paper to manipulate where the colors would run and mix.

Repeat these steps until the effect you like is achieved.


**not pictured**I applied the same colors to the edges of the feature photo around the gesso stenciling in the same style as the background.


To create a matte for my photo, I used the same spray colors and applied them to a transparency sheet. Since the transparency is a non porous surface, it takes a bit longer for the sprays to dry. Don't use a heat gun, as it will warp or melt the transparency.

I cut the first layer just bigger then the feature photo and adhered the photo centered on it. Making a bundle of black thread I adhered it to the back of this first matte. I cut the second matter to be a bit bigger then the first. Using pop dots I adhered this to the first matte/photo section.


Adhere the matted photo to the right side of the layout using more pop dots to add more depth.


And a few peeks of this little gem a little closer up...


Creating is important, documenting is important. One day we will be gone, and I like to think by creating pretty things we leave a bit of beauty. And by documenting events and people we will keep the memories going and help people after us remember!

Thank you so much for popping in to check out my tutorial using the ever amazing Limor Webber Designs products. Make sure to check out my Facebook and Instagram for more inspiration, tutorials and favorite products!

Feel free to peruse the rest of the DT Inspiration site, for some amazing tutorials by the ridiculously amazing Limor Webber Designs DT!

Funny thing, your husband called AGAIN!!! He said it's still ok to buy whatever you want ;)!!

Here is a good place to start! 


Supplies:
Read More »

Wednesday, July 1, 2015

Love More by Marta Lapkowska

2


Hello crafty people! It's Marta Lapkowska here. I am so happy to be here as Limor Webber guest designer sharing my love for mixed media and journals.

For my first post I shared with you the cover of this journal. Today I am sharing with you a page in this same journal.


This mini book is a mini journal boards from Faber-Castell Design Memory Craft®. My journal pages includes some Double Scoop Gelatos® - Metalic Melon and Bubble Gum.


To build my background, I added IndigoBlu Limor Webber 'Rugged Edge' stamp set, to add a little texture. My main focus of the spread is on the butterfly. I created this image with IndigoBlu 'Ink Splat Butterfly' stamp also designed by Limor Webber.


I hope you will enjoy my video tutorial.


I hope you enjoyed this journal page tutorials.  You can access my first post by clicking here.

Happy creating.
Love,
Marta xx

Read More »

Friday, June 26, 2015

Mixed Media Journal Page - Techniques with Gelatos

17


Hi ! It's Vicky here today and I am happy to share a page of my mixed media journal.


Today's post will feature Limor's Signature Lines from IngoBlu and Lindy's Stamp Gang: 

IndigoBlu Stamps designed by Limor - Rugged Edges Stamp


I have started this journal a while back and I want to turn it into a flower themed one. So each page will feature flowers as the focal point. This journal is the Mixed Media Mini Journal Boards  by Faber-Castell Design Memory Craft®   I love the pages on this journal, because they are nice and thick. They are actually chipboard pages that can take mediums, water or heat with no problem!


The background, all the shading and the coloring of the flowers was done using gelatos. In the how-to video below you will see how easy they are to use and blend. I am also sharing a great technique for shading your focal elements. 


Shading is vital if you want your images to pop. I love the vibrant background in this layout and you will be surprised to find out how easy it is to make. I have also used one stamp from the "Rugged Edge" set by Limor Webber to do some embossing on the edges. This really frames my art.


You can watch a step by step video tutorial on how I made this page below:


To view the previous page in this journal - please click here.

Thank you all for visiting today! Have a great and creative day :)

Vicky
http://www.clips-n-cuts.com/


Supplies:


Read More »